Amazon API Gateway

Getting Started with Amazon API Gateway
In the serverless world, most applications are built around REST APIs — a set of resources and actions that allow clients to perform operations like creating, reading, updating, or deleting data. To expose these APIs securely and efficiently, we use Amazon API Gateway, which acts as the front door to your backend services such as AWS Lambda or even any web application. API Gateway not only lets you expose your Lambda functions as REST APIs, but also provides powerful features like versioning, authentication, monitoring, caching, and throttling, making it a complete solution for API management.
Beyond REST APIs, API Gateway also supports WebSocket APIs for two-way communication — ideal for real-time apps like chat or live dashboards. Since it’s a fully managed, serverless service, you only pay for the number of API calls and the duration of usage, keeping costs predictable and efficient. With seamless integration into Lambda and other AWS services, API Gateway is the backbone for building modern, secure, and scalable serverless applications.
🔀 Different API Types in Amazon API Gateway
Amazon API Gateway offers multiple API types, each designed for different use cases. Understanding these helps you choose the right one for your application.
🌐 REST API
The traditional REST API in API Gateway is fully featured and widely used to build RESTful services. It supports:
Request/Response validation
API caching to improve performance
Custom request/response transformations
Tight integration with AWS services like AWS X-Ray, AWS WAF, and more
REST APIs are ideal when you need advanced features and deep control over your API behavior.
⚡ HTTP API
The newer HTTP API was introduced to simplify building RESTful APIs. It’s faster, cheaper, and lower latency compared to REST APIs. Key highlights:
Automatic deployments with less configuration overhead
Ideal for simple REST endpoints where advanced features of REST API aren’t needed
A modern choice for most new API-driven applications
🔗 WebSocket API
Unlike REST or HTTP APIs, WebSocket APIs provide persistent connections between client and server. This allows full-duplex communication, meaning data can flow both ways in real time. Common use cases include:
Chat applications
Live notifications
Real-time dashboards
Use REST API when you need advanced API features and tighter AWS integration.
Use HTTP API for newer, simpler, and cost-efficient APIs with lower latency.
Use WebSocket API when you need persistent, two-way connections.
Creating a REST API in Amazon API Gateway
1. Navigate to API Gateway
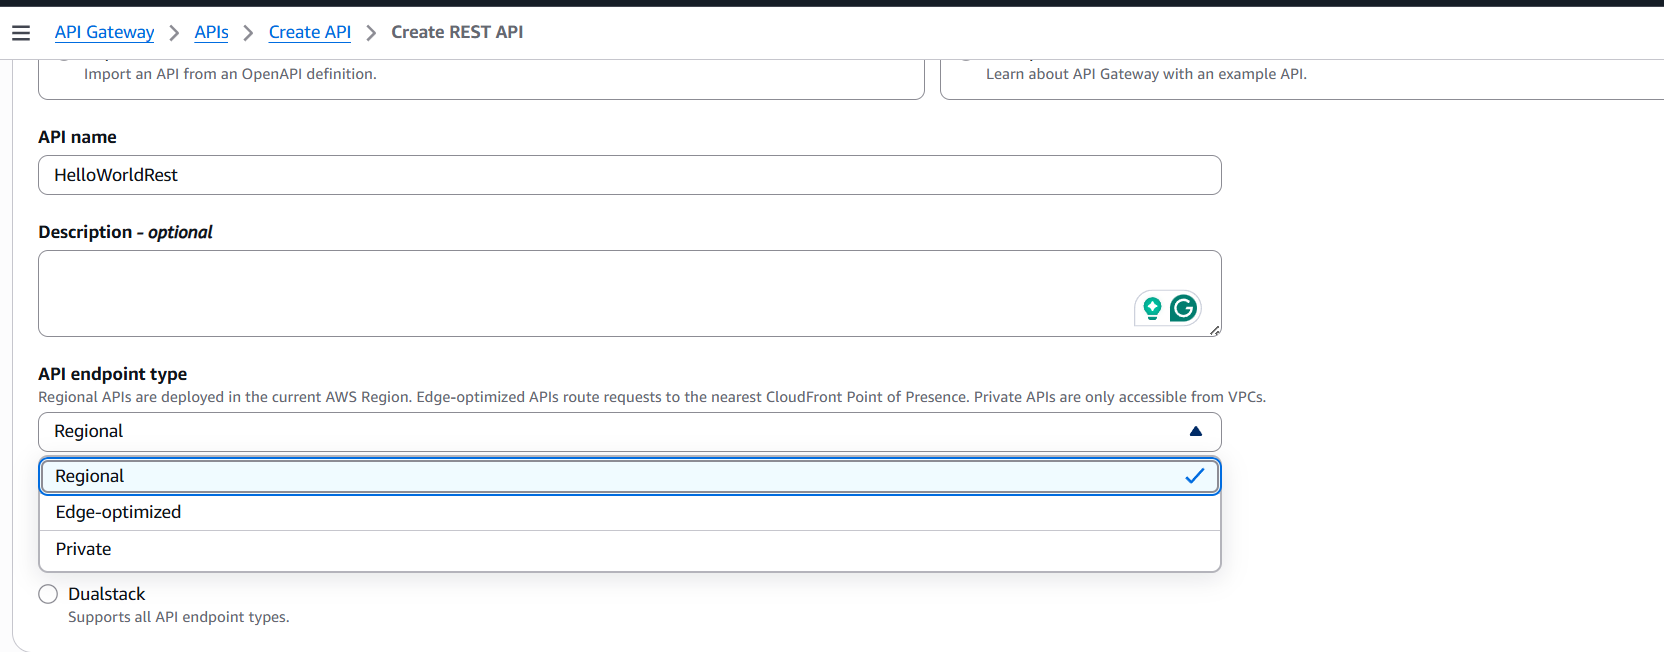
From the AWS Management Console, search for API Gateway. Choose REST API and then click on Create API.
You’ll be prompted to provide:
API Name – for example,
HelloWorldRest.Description – optional.
Endpoint Type – you can choose from:
Regional – accessible within the selected AWS region.
Edge-optimized – routes requests via CloudFront (best for global users).
Private – accessible only inside your VPC.
👉 In our case, we select Regional.
2. Create a Resource
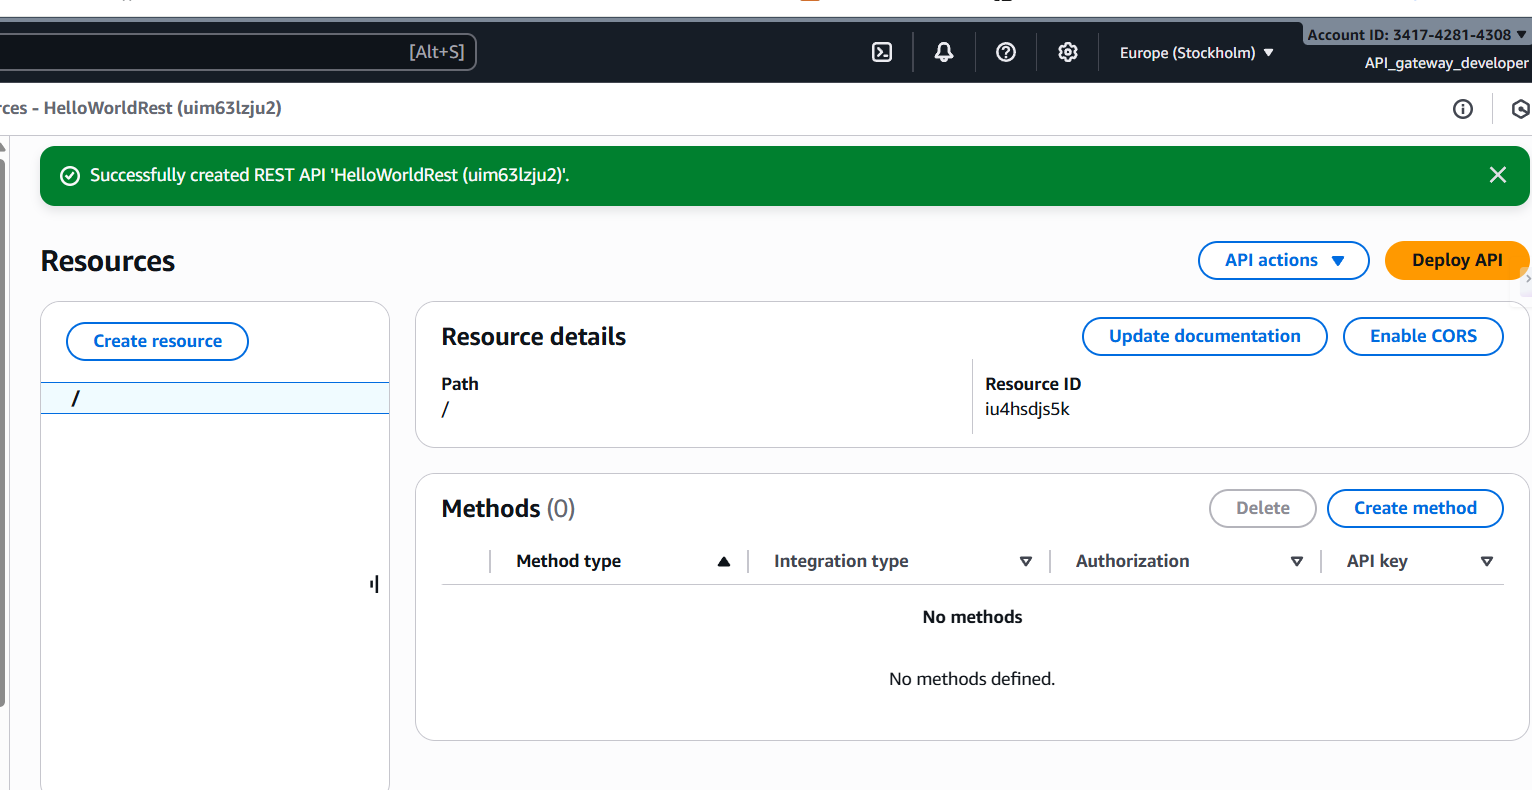
Once the API is created, you’ll see a blank API structure.
Click Create resource.
Provide a Resource Path (e.g.,
/hello-world).Provide a Resource Name (e.g.,
hello-world).Optionally enable CORS (Cross-Origin Resource Sharing) if your API will be accessed from browsers.
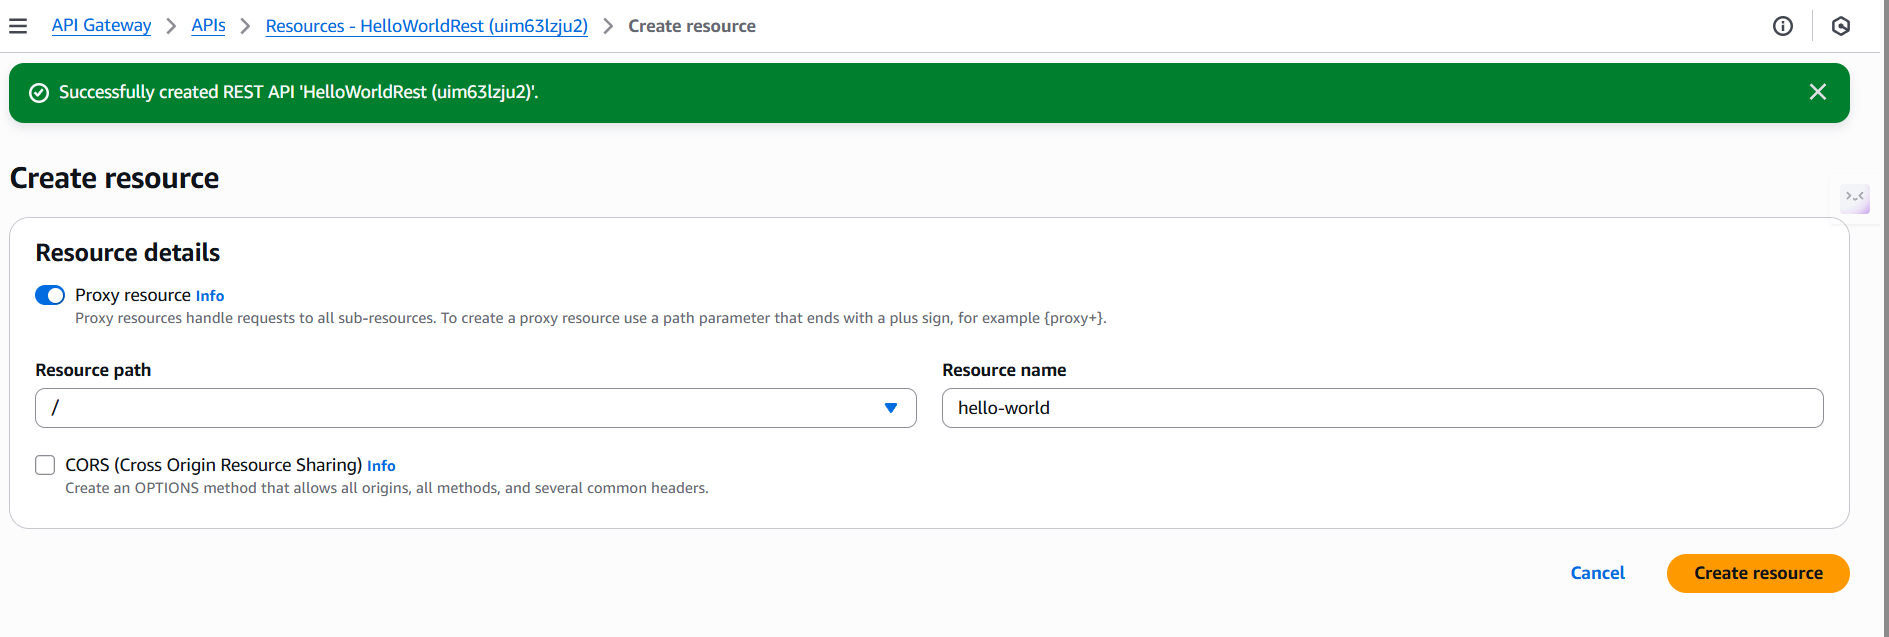
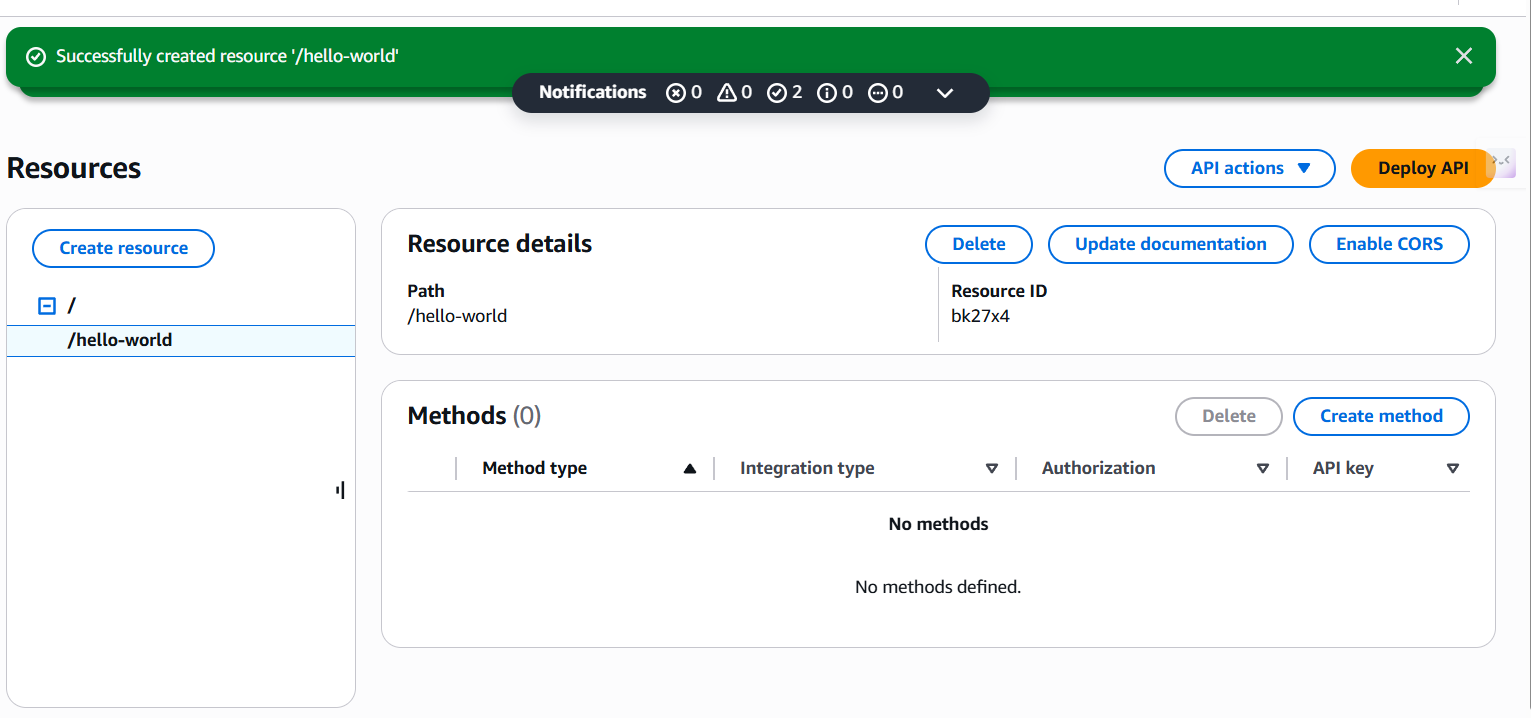
3. Create a Method
Next, select the resource you just created (/hello-world) and click Create method.
Here, you can choose an HTTP method like GET, POST, PUT, or DELETE.
When creating a method, you also need to define the integration point, i.e., where the logic for this API resides. API Gateway itself doesn’t contain the business logic—it only acts as a proxy to your backend.
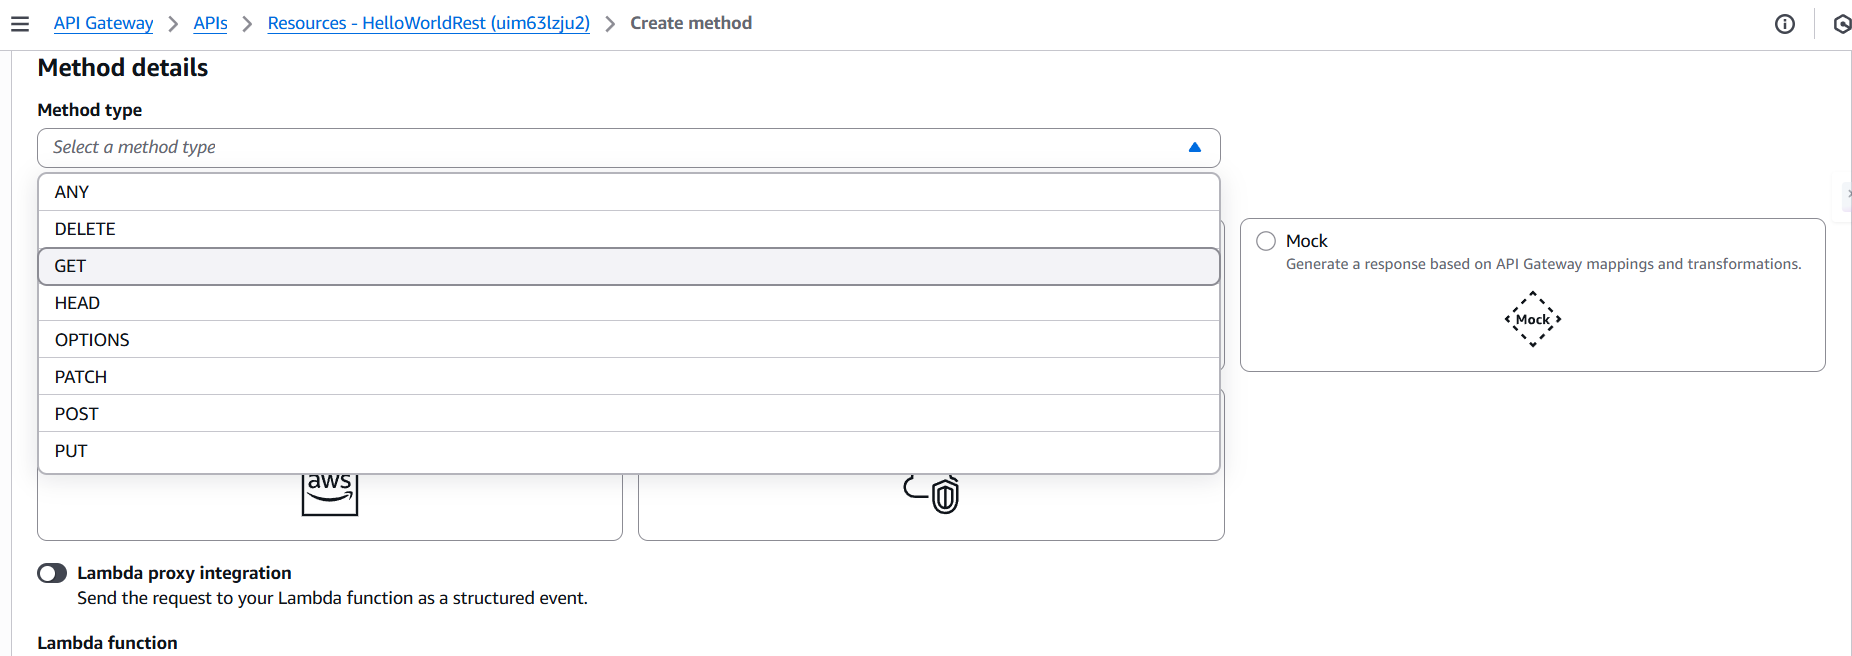
4. Select Integration Type
Amazon API Gateway supports multiple integration options:
Mock Integration – simulates an API response without needing any backend.
Lambda Function – connects to an AWS Lambda function where business logic is implemented.
HTTP / HTTPS – forwards the request to an HTTP backend.
Other AWS Services – directly call services like DynamoDB or Step Functions.
👉 For testing, we can first use Mock Integration to quickly validate API behavior. Later, we’ll integrate with AWS Lambda.
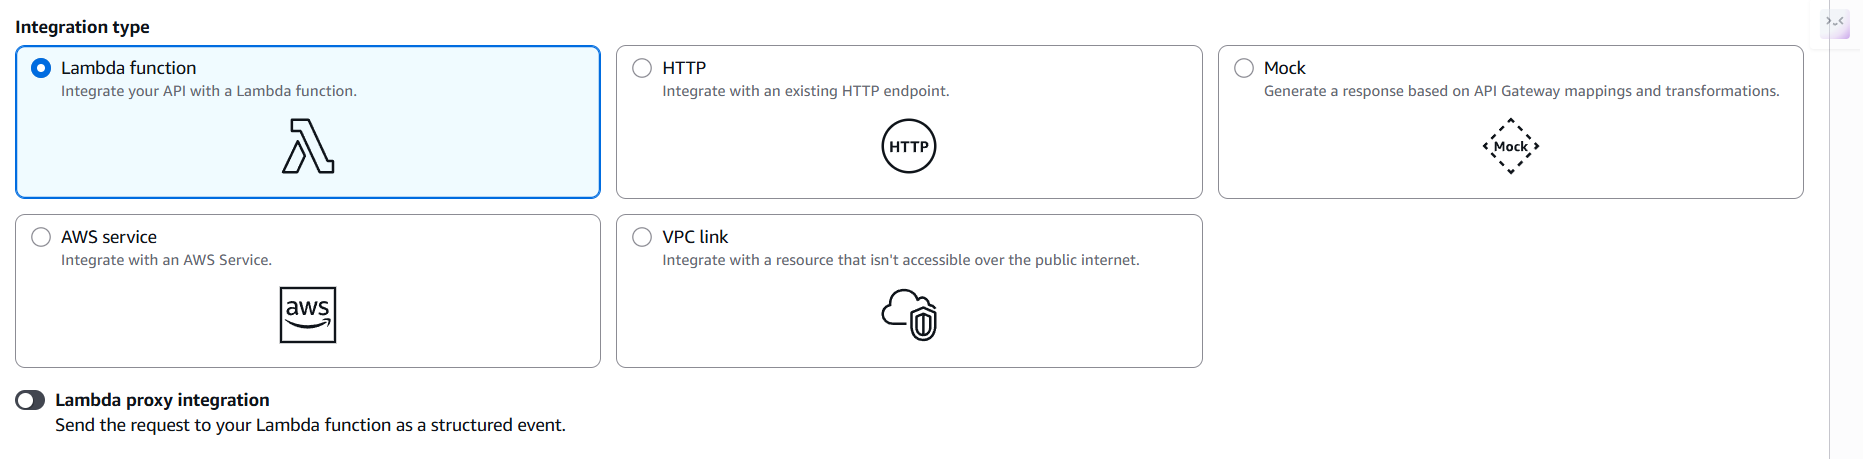
5. Test the API
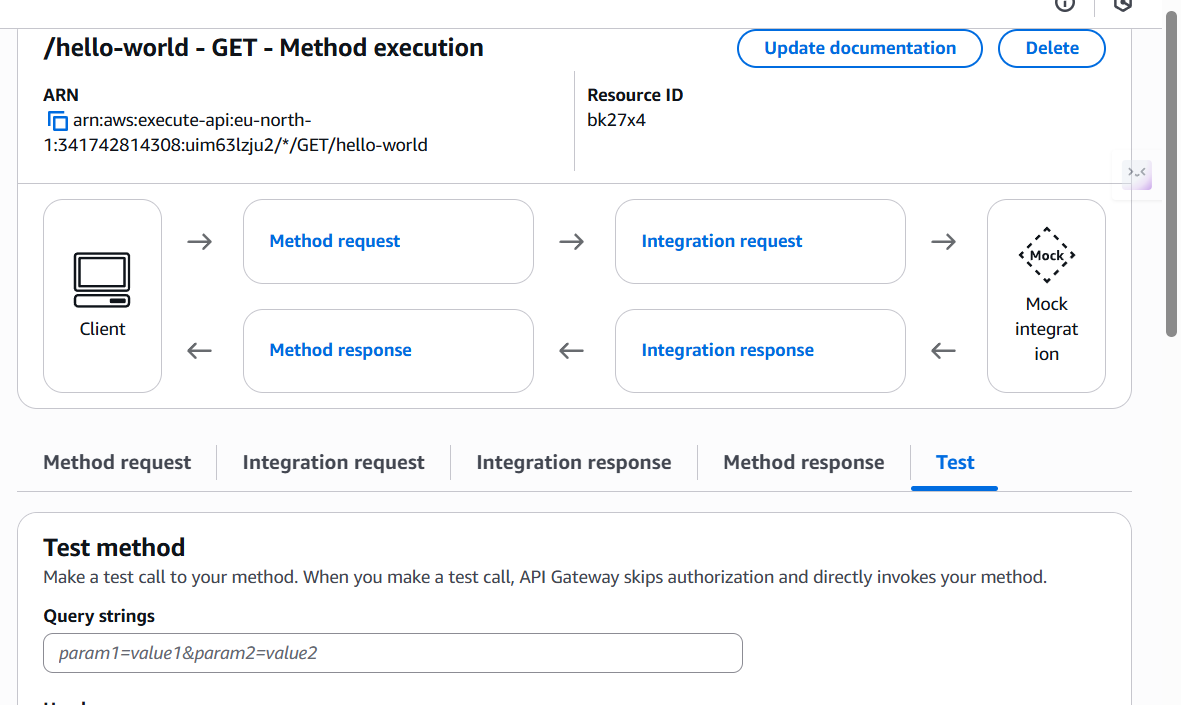
Once the method is created and integrated, you can test it directly from the API Gateway console:
Click on the created method.
Choose Test.
Provide request details (if required).
Execute the request to see the mocked or Lambda-generated response.
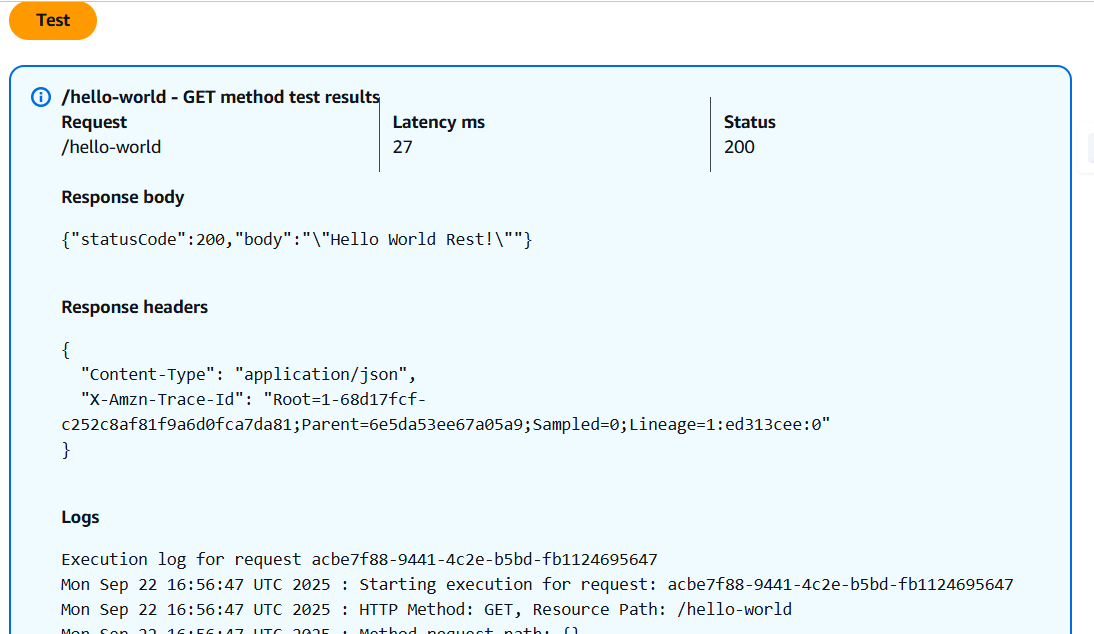
This confirms that your REST API is working as expected
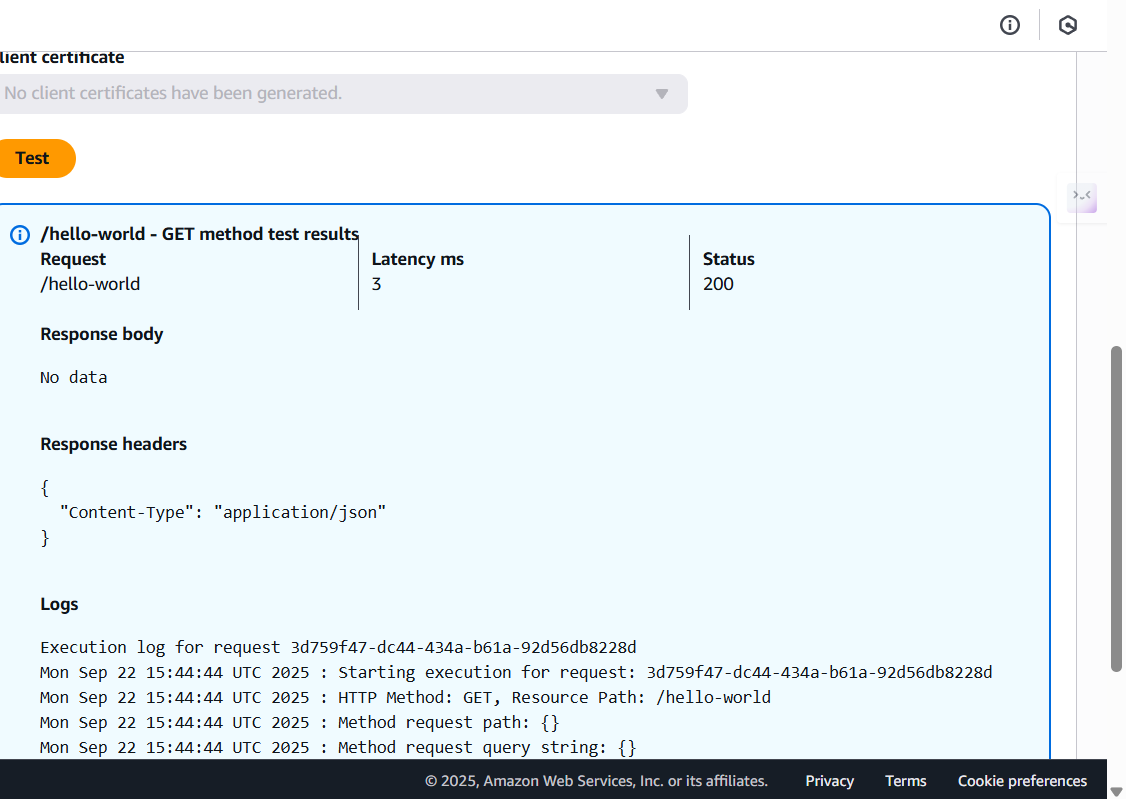
Method Execution in API Gateway
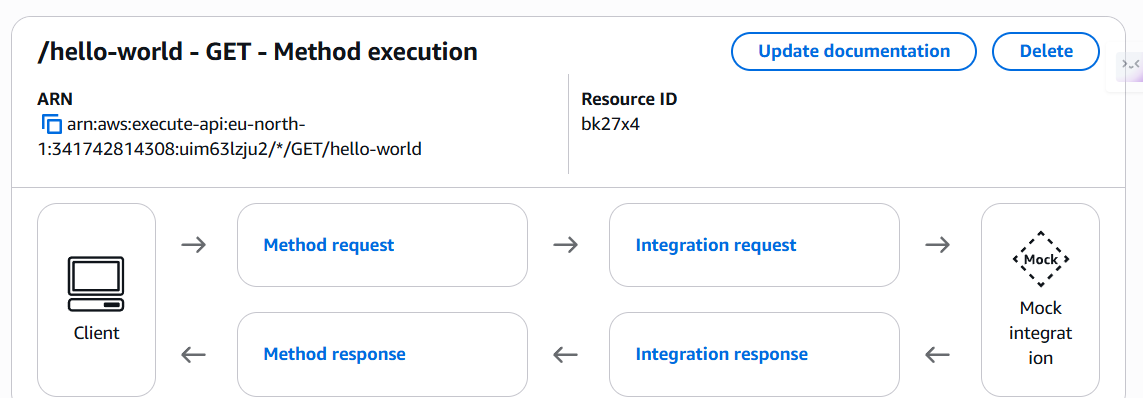
When you create a method (like GET or POST) in API Gateway, there are four important building blocks in the method execution flow:
Method Request
This represents the request coming from the client into API Gateway.
Here, you can define:
Authentication & authorization requirements (e.g., IAM, Cognito, API keys).
Input validation rules.
Expected query parameters, request headers, and request body structure.
In short, this is the first checkpoint where you decide what kind of request your API will accept.
Integration Request
Once the request passes validation, it is sent to the integration endpoint.
In our case, we are using a Mock integration, so the backend is simulated.
Here, you can also transform the incoming request before it reaches the backend. For example:
Map input parameters into a new format.
Change JSON keys to match what the backend expects.
Essentially, this stage prepares the request for the backend system.
Integration Response
After the integration endpoint (mock, Lambda, or any backend) processes the request, it sends back a response.
In this stage, you can:
Transform the backend response into a format expected by the client.
For example, rename fields, wrap the payload, or modify error messages.
This ensures the client always receives a clean, consistent response.
Method Response
Finally, this is the response going back to the client.
You define:
Possible HTTP status codes (200 OK, 400 Bad Request, 500 Internal Server Error).
The structure of the response body.
Headers to include in the response.
This is the last checkpoint before the API response leaves API Gateway.
Method Request → validate incoming requests.
Integration Request → map & transform requests for backend.
Integration Response → transform backend responses.
Method Response → define final response for the client.
Integrating API Gateway with a Lambda Function
So far, we have worked with a Mock integration to understand the request–response cycle in API Gateway. Now, let’s integrate a real backend — an AWS Lambda function — to handle requests dynamically.
1. Create a Lambda Function
Go to the AWS Lambda Console and click Create Function.
Choose Author from scratch, give it a name (e.g.,
HelloWorldRest), select a runtime (like Python or Node.js), and create the function.Inside the function editor, add simple code to return a JSON response. Example:
export const handler = async (event) => {
  console.log(event)
  const response = {
    statusCode: 200,
    body: JSON.stringify('Hello World Rest!'),
  };
  return response;
};
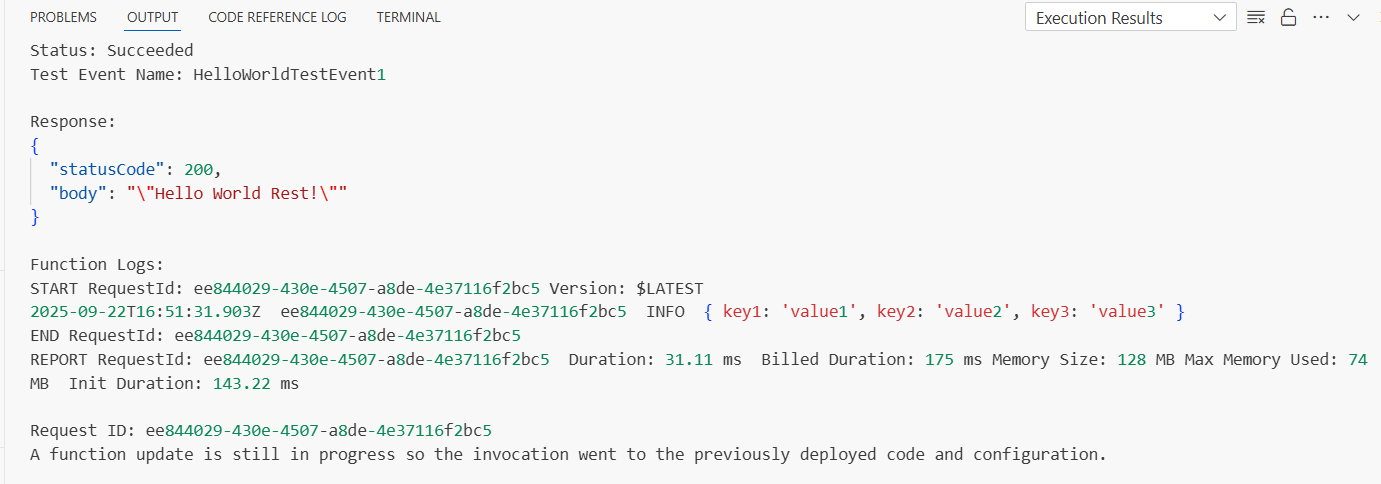
2. Create a Test Event and Verify
In the Lambda console, configure a test event with sample JSON input.
Run the test to ensure the function executes successfully and returns the expected response.
3. Connect Lambda to API Gateway
Go back to your API Gateway where you created the REST API.
Choose your resource and method (for example,
GET).In the Integration Request section, change the integration type from Mock to Lambda Function.
Select the Lambda you created (
HelloWorldRest).Save and deploy the API.
4. Test the API Gateway Endpoint
Once deployed, you’ll receive an Invoke URL for the API Gateway endpoint.
Call this endpoint (from Postman, curl, or browser).
API Gateway will now pass the request to the Lambda function, and you’ll see the Lambda response returned as an HTTP response.
Mapping Templates in Integration Request
When you connect API Gateway to a backend like Lambda, the request coming from the client may not always match the format your Lambda function expects. That’s where Mapping Templates come in.
A Mapping Template is written in Velocity Template Language (VTL) and allows you to:
Transform the incoming request before sending it to the integration (Lambda, HTTP service, etc.)
Extract or rename query parameters, headers, or body fields
Format the request payload as required by your backend
Example Scenario
Suppose your client sends this request to API Gateway:
{
  "username": "naaz",
  "role": "admin"
}
But your Lambda function expects this format:
{
  "user": {
    "name": "naaz",
    "access": "admin"
  }
}
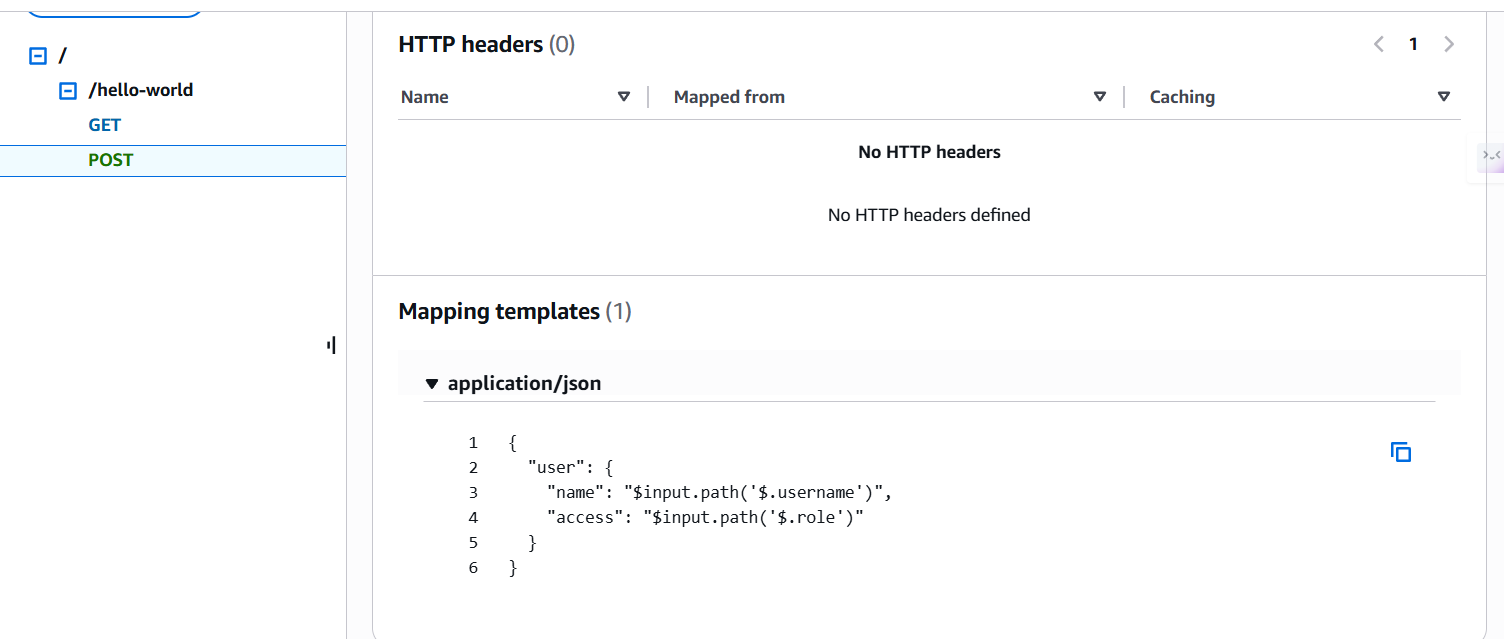
You can define a Mapping Template in the Integration Request to transform it automatically.
Steps to Add Mapping Template
Go to your API Gateway Method → Integration Request.
Expand the Mapping Templates section.
Choose Content-Type (e.g.,
application/json).Add a template using VTL syntax:
{
  "user": {
    "name": "$input.path('$.username')",
    "access": "$input.path('$.role')"
  }
}
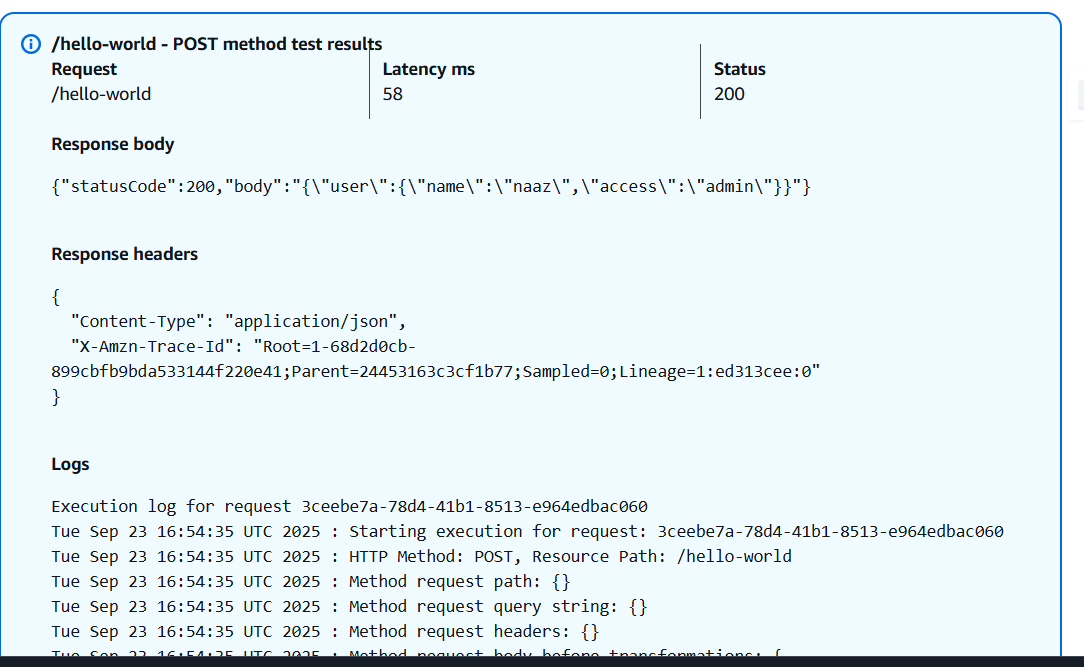
Testing the Transformation
Send the original client request (
username,role).API Gateway applies the mapping template.
Lambda receives the modified JSON (
user.name,user.access).
Validating Request Body Using Models in API Gateway
When exposing APIs through API Gateway, it’s important to ensure that clients send requests in the correct format. To enforce this, API Gateway allows you to define Models and use them to validate request bodies before they reach your backend (like Lambda).
What is a Model?
A Model in API Gateway is basically a JSON schema that defines the structure of the request body. It describes:
Which fields are required
What data types are expected
Any nested objects and constraints
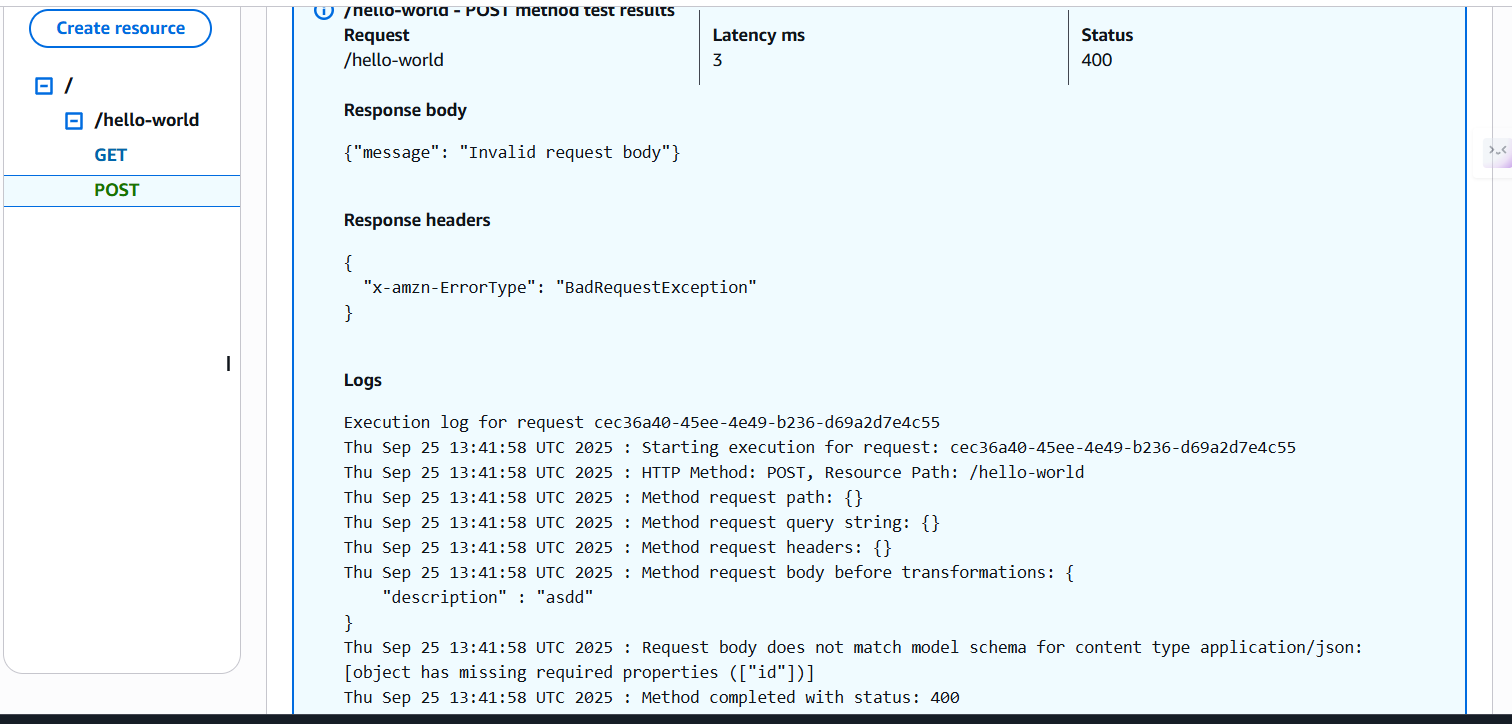
By attaching a model to a method request, API Gateway automatically checks incoming requests and rejects invalid ones with a 400 Bad Request before they hit your Lambda or backend.
Steps to Validate Request Body
Create a Model
In your API Gateway console, go to Models and create a new model.
Define the schema in JSON format. Example:
{
  "$schema" : "http://json-schema.org/draft-04/schema#",
  "title" : "Error Schema",
  "type" : "object",
  "properties" : {
    "id" : { "type" : "integer" },
    "description" : { "type" : "string" }
  },
  "required" :["id"]
}
This schema enforces that every request must have a
username(string) andage(integer).
Attach the Model to a Method
Navigate to your Method Request (for example,
POST /user).Under Request Body, choose
application/jsonand link it to the model you created (UserModel).
Enable Validation
Turn on Request Validator at the method level.
Options include:
Validate body only
Validate parameters only
Validate both body and parameters
Example Flow
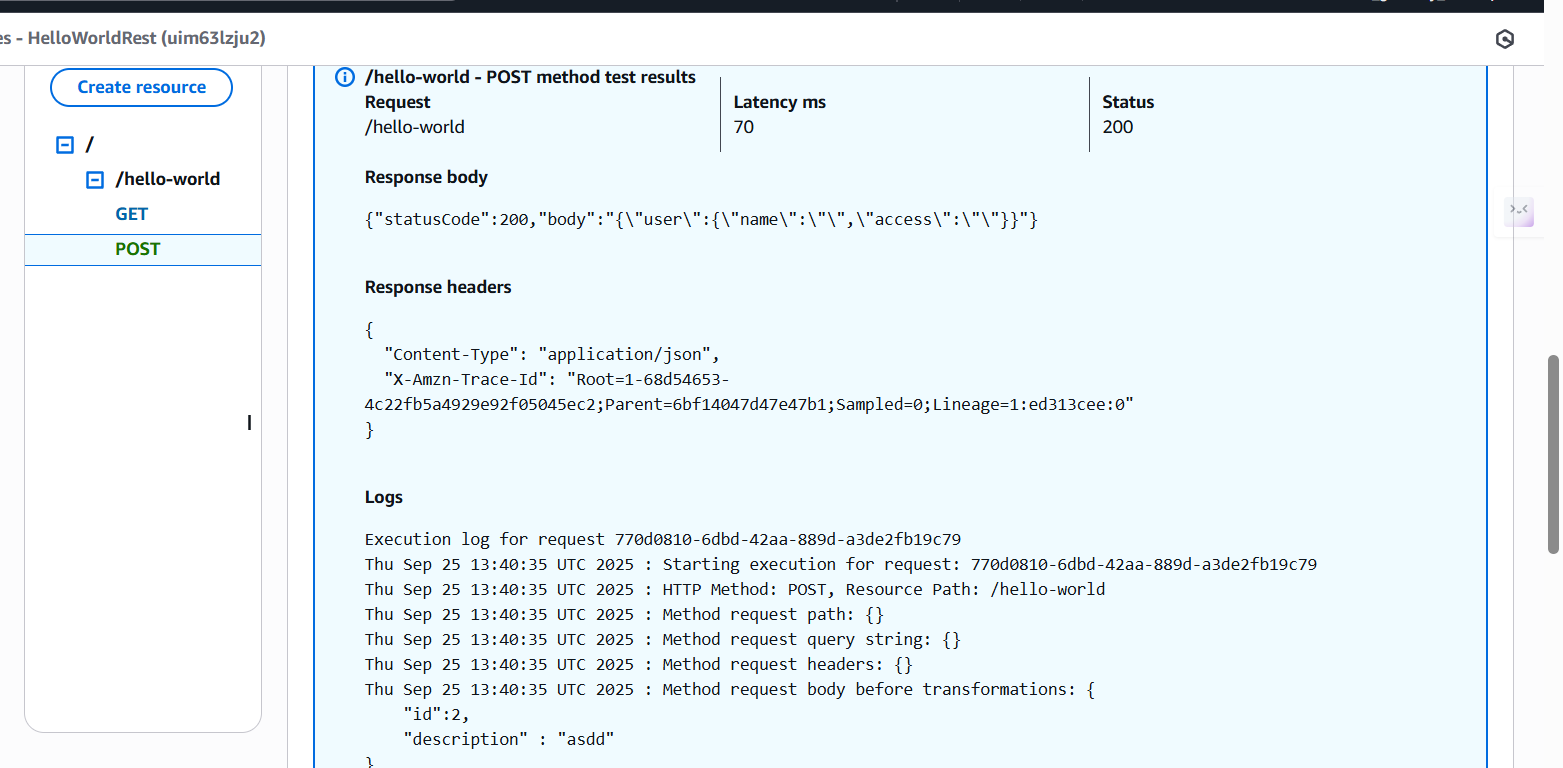
✅ Valid request body:
{
    "id":2,
    "description" : "asdd"
}
❌ Invalid request body:
{
    "description" : "asdd"
}